Chicken Manure Drying Equipment Maintenance Guide
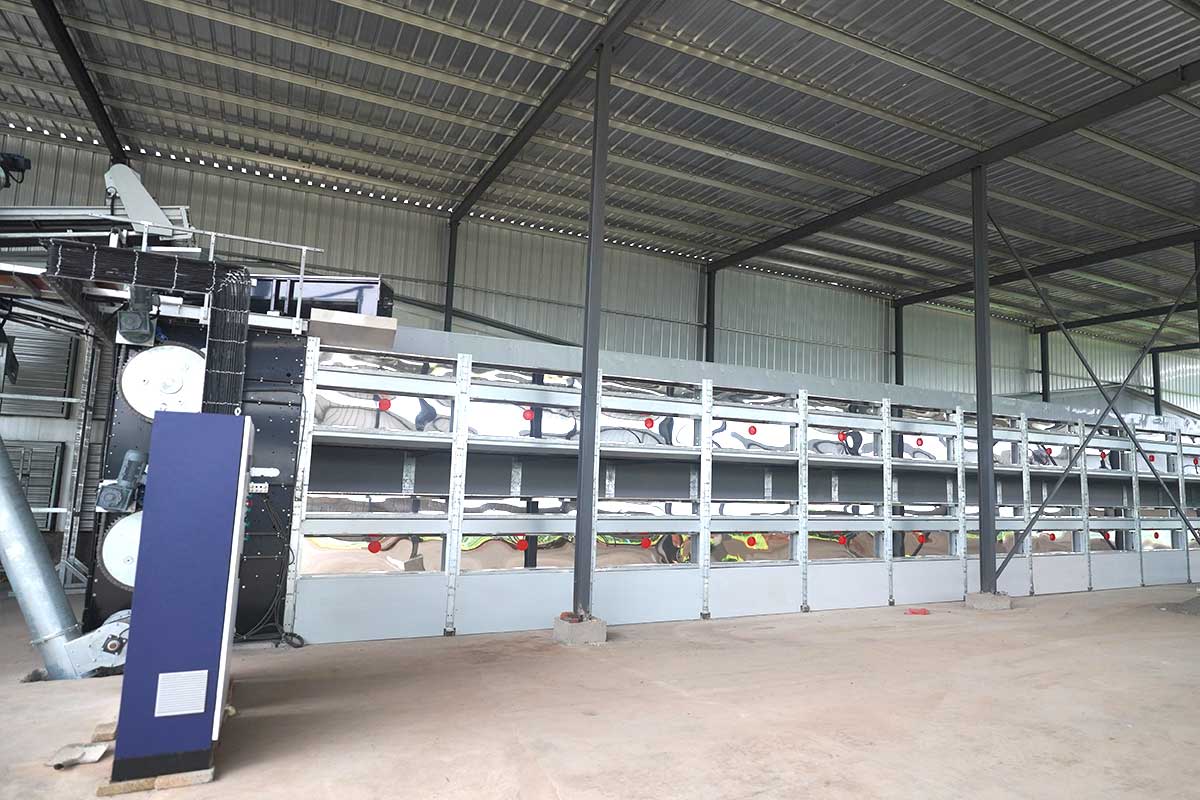
Chicken manure drying equipment is an indispensable core facility in modern egg-laying hen farms. However, many farmers neglect routine maintenance after purchasing the equipment, leading to frequent malfunctions, reduced drying efficiency, and significantly shortened lifespan.
In fact, machine maintenance is an extremely important and ongoing task. It should be closely coordinated with equipment operation and repair, and should be carried out by dedicated personnel on-duty inspections. This article will systematically outline the key points of chicken manure drying equipment maintenance to help farms establish a scientific equipment maintenance system.
I. Why is The Maintenance of Chicken Manure Drying Equipment so Important?
Chicken manure drying equipment operates in a high-humidity, high-temperature environment for extended periods. The acidic substances and moisture in chicken manure cause continuous corrosion to the machine itself. Simultaneously, chicken manure easily adheres to the inner walls of the equipment; if not cleaned promptly, this can lead to clumping, blockages, and further corrosion.
The direct benefits of proper maintenance include:
Extended equipment lifespan: Regular maintenance significantly reduces wear and corrosion;
Ensuring drying efficiency: Clean air ducts and filters ensure smooth ventilation, avoiding the embarrassment of incomplete drying;
Reduced failure rate: Timely detection and resolution of problems and potential malfunctions reduce unplanned downtime;
Energy savings: When the equipment is operating well, thermal efficiency and airflow are guaranteed, naturally reducing energy consumption.
II. Daily Maintenance
1. Equipment Cleaning
Wipe the equipment with a soft cotton cloth to keep its appearance clean. Chicken manure drying equipment operates in a farm environment, and dust and dirt easily accumulate on its outer surface. Regular wiping not only maintains the equipment’s appearance but also prevents dirt from penetrating its interior.
2. Pre-Start Inspection
Add lubricating oil promptly when the oil level is low and drain any excess water. The air supply system is crucial for the normal operation of the drying equipment; insufficient oil or water accumulation will affect its performance.
3. Cleaning the Filter and Dust Collection Box
Clean the lint and cotton fibers from the filter in the dust collection box to ensure good ventilation. Filter clogging is the most common cause of incomplete drying—once clogged, airflow is significantly reduced, leading to slower drying speeds or even incomplete drying, while also wasting energy.
4. Removing Residue from the Drum
After shutdown, promptly remove any remaining chicken manure from the drum to prevent clumping and corrosion. Chicken manure left inside the equipment for too long will harden into lumps, making it difficult to clean and potentially corroding the inner walls of the equipment. 5. Check for ventilation and blockages
Check the screen and inlet/outlet for blockages to ensure smooth ventilation. Any blockage will affect the airflow of the entire drying system and reduce drying efficiency.
III. Weekly Maintenance
1 Cleaning Exhaust Pipes and Elbows
Clean exhaust pipes and elbows at least once a month (weekly inspection is recommended). Exhaust pipes are prone to accumulating feathers and dust. If not cleaned promptly, drying time will be prolonged, and excessive debris can cause fire hazards.
2 Cleaning Burner Ash (If Equipped with a Hot Air Furnace)
If the equipment is equipped with a hot air furnace as an auxiliary heat source, carbon and ash deposits on the burners must be cleaned weekly to prevent contamination from being drawn into the equipment. Ash accumulation also reduces thermal efficiency and increases fuel consumption.
3 Checking for Abnormal Noises
Maintenance personnel should promptly check all parts of the equipment for abnormal noises. If any abnormalities are found, they should be addressed immediately. Abnormal noises are often precursors to equipment malfunctions; early detection and treatment can prevent greater losses.
IV. Monthly Maintenance
1. Deep Internal Cleaning
Open the rear cover and clean the inside of the equipment with a soft cotton cloth. Monthly deep cleaning removes dust and material residue from hard-to-reach areas that are difficult to clean daily.
2. Bearing Lubrication – Crucial
Bearings bear the entire load of the machine. Good lubrication has a decisive impact on bearing life, directly affecting the machine’s service life and operating rate.
Lubricating oil (or grease) must be added to the bearing housings monthly to ensure bearing lubrication. Main lubrication points include:
Rotating bearings
Roller bearings
All gears
Moving bearings, sliding surfaces
Note: The lubricating oil must be clean, and the seals must be in good condition. Experienced technicians recommend adding high-temperature lithium-based grease every 500 hours.
3. Check Belts and Chains
Check belt tension and adjust pulleys as needed. Observe the chain and belt for looseness or wear, and adjust or replace them promptly. A loose belt will result in insufficient speed, directly affecting the drying effect.
4. Tighten Loose Parts
Tighten parts that are prone to loosening or detachment due to vibration, including electrical wiring, door cranks, and pipe connections. Check connecting bolts weekly with a torque wrench.
5. Check for Air Leaks
Check the cylinder and pipes for air leaks. Air leaks severely reduce thermal efficiency and cause energy waste. Test the connection by hand; if hot air leaks out, the sealing strip needs to be replaced.
6. Clean Internal Dust
Regularly clean internal dust. Dust accumulation affects heat transfer efficiency, making it difficult for the equipment to reach the set temperature.
V. Quarterly/Annual Deep Maintenance
1. Quarterly Maintenance
Purge heat exchangers, flues, and other components with compressed air every quarter. Stubborn carbon deposits require treatment with professional cleaning agents. Simultaneously, thoroughly inspect refractory materials (such as the combustion chamber) for detachment and repair promptly.
2. Annual Maintenance
Annual maintenance should include the following:
Check for loose mounting bolts and tighten them;
Check the tightness of support spring connections and adjust accordingly;
Check equipment grounding to ensure safety and reliability;
Check wiring and control cabinet for aging to avoid short circuit risks;
Dust the inverter and PLC module to ensure good heat dissipation;
Test the drying energy consumption ratio. If efficiency drops significantly, check the hot air system or insulation layer.
VI. Maintenance Precautions
Designated Personnel: Daily inspection and maintenance of the equipment should be handled by trained personnel.
Safety First: Installation, adjustment, repair, and maintenance must be performed with the power off to ensure safety.
Uniform Feeding: Feeding should be uniform; avoid overfeeding or prolonged stagnation.
Shutdown Sequence: When temporarily stopping the machine, the feed gate must be closed first, then the blower stopped.
In Case of Sudden Power Outage: Immediately rotate the drum to quickly discharge the material inside, avoiding material loss.
Frequent Maintenance, Fewer Major Overhauls: Many minor problems escalate into major repairs; daily inspections are crucial.
Maintenance of chicken manure drying equipment is not optional; it is a core aspect affecting equipment lifespan, drying efficiency, energy consumption, and safe production. Establishing a complete maintenance system of “daily inspection, weekly maintenance, monthly upkeep, quarterly overhaul, and annual major overhaul,” and assigning dedicated personnel to strictly implement it, is essential for the long-term stable and efficient operation of the equipment.