Standardized Cleaning and Disinfection Procedures for Poultry Farms
In the hygiene and disease prevention system of poultry farms, disinfection is placed at the core. However, a widely overlooked truth is that disinfectants cannot penetrate organic matter. Residual chicken manure, feed dust, grease films, and other contaminants significantly deplete the effective components of disinfectants, leading to disinfection failure.
Therefore, cleaning is a prerequisite for disinfection and the first line of defense for biosecurity in poultry farms. Only by achieving thorough physical removal can chemical disinfection exert its maximum effectiveness.
Washing operations in commercial chicken farms are a systematic project involving multiple dimensions such as spatial order, equipment operation, personnel coordination, and cleaning of hard-to-reach areas. Based on practical experience from large-scale chicken farms, this article provides a complete breakdown of a standardized and replicable washing process to help farms fundamentally cut off disease transmission routes and reduce the risk of cross-infection between batches.
I. Three Essential Preparations Before Rinsing
Before turning on the high-pressure water gun, the following basic preparations must be completed; otherwise, the rinsing process will be frequently interrupted, significantly reducing efficiency.
1. Water, Electricity, and Lighting Guarantees
Water and Power Supply Check: Ensure sufficient water pressure for rinsing (it is recommended that the high-pressure washer’s outlet pressure be no less than 15-20 MPa), that the electrical system is safe and reliable, and that all sockets and cables have waterproof and leakage protection.
Lighting Intensity: The lighting inside the chicken coop must ensure sufficient illumination on the operating surface, making it easy for rinsing personnel to spot hidden dirt. Especially in dark areas such as the bottom of cages, corners, and the back of fan blades, insufficient light can easily lead to missed areas.
2. Pipeline Separation to Ensure a Clean Working Surface
Machine and Cable Separation Principle: The gun cable should be in front of the machine, and only the gun cable should be retained on the operating surface. No excess water pipes or machine cables should be left on the working surface. This detail ensures the operator’s mobility and avoids tripping accidents or equipment damage caused by tangled and piled-up water pipes and wires.
3. Personnel Division of Labor and Protective Equipment
Clear Division of Labor: It is recommended to arrange 2-3 people as a group, with one person in charge of flushing, one person assisting with hose pulling, and one person checking and replenishing flushing. Collaborative work maximizes efficiency.
Protective Equipment: Flushing personnel must wear non-slip boots, waterproof aprons, goggles, and gloves to prevent eye injuries from high-pressure water splashes and to avoid skin contact with contaminated water that could cause infection.
II. Standardized Rinsing Sequence
The rinsing sequence is designed according to the principles of “top to bottom, inside to outside, dry to wet,” ensuring that wastewater and dirt from the upper rinsing will not cause secondary pollution to the already cleaned lower areas.
Core Operating Techniques
Dual-Machine Reverse Advance: Starting from the middle of the chicken coop, two high-pressure washers advance towards both ends (or in opposite directions), rinsing row by row without interference, doubling efficiency.
Double Coverage: Each surface requires two 360° rinses, one on each side. The first rinse wets and softens the dirt; the second rinse focuses on thoroughly removing residue.
Sprayer Operation Standards: Except for the top, when rinsing other items, use the method of “holding down the sprayer and advancing at a constant speed” to ensure even rinsing force and avoid omissions.
Step 1: Ceiling Washing – From the Center Line Outwards
The ceiling is the area most prone to accumulating dust, cobwebs, and feathers. Wash from the center line outwards, using high-pressure water to wash away the deposits. A clean ceiling prevents subsequent wall and cage washing from contaminating the ceiling, reducing rework.
Step 2: Washing the Air Curtain, Ducts, and Downdraft Fan
The inner walls of the air curtain and ducts easily accumulate feed dust and mold spores. During washing, thoroughly clean the outer walls of the ducts. The downdraft fan blades and guide shields should be washed repeatedly from multiple angles to ensure no lint remains.
Step 3: Washing the Walls, Small Windows, and Flip-Up Panels
This is the most technically challenging area for washing, and the order of operations is crucial: First, wash the small windows and the walls above the ducts, proceeding from top to bottom.
Then wash the small windows, ducts, and the downdraft fan itself.
Finally, wash the walls below the small windows and ducts.
Small Window Details: The inner and outer walls of the small window, the flap, and the guide plate must all be thoroughly rinsed. After rinsing, close the small window to prevent debris from entering and to create a sealed space for subsequent fumigation and disinfection.
Step 4: Rinsing the Horizontal Feed Pipe, Feed Box, and Tail End
The feed line is a major area for feed residue. Key points: Rinse the outside of the feed pipe and the inside and outside of the feed box thoroughly, paying particular attention to ensuring no wastewater remains inside the feed box, otherwise the feed will easily become moldy.
Rinse the tail end, pressure regulating valve, water level pipe, and other detailed components one by one.
Step 5: Chicken Cage Rinsing
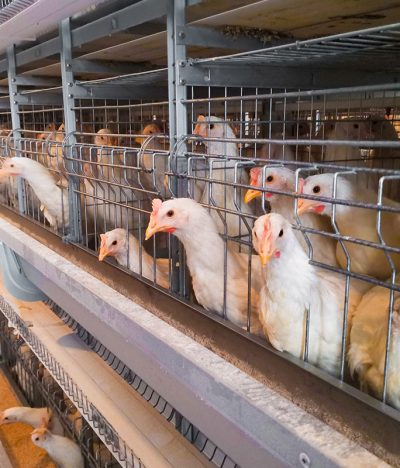
The chicken cages are the core area for rinsing, with high density and many dead corners. It is recommended to rinse from the third/fourth cage down, layer by layer, so that the dirt rinsed from higher layers will not fall into the already cleaned lower cages.
Proceed from front to back in each cage layer.
Rinsing Coverage: Rinse the mat, bottom cage mesh, top cage mesh, side mesh, front mesh, rear mesh, water line, water cup, feed trough, etc., one by one.
Manure Belt Treatment: After all cages have been rinsed, start the manure belt system at the rear of the chicken house and thoroughly rinse the manure belt, also cleaning the machine head area.
Step 6: Fan Flushing
Fans are the channels for air exchange between the chicken house and the outside environment, and are also corners where pathogenic microorganisms can easily hide.
Indoor Flushing: Use a high-pressure water gun to repeatedly rinse the fan screen, fan frame, pulleys, belts, opening devices, fan blades, and fan louvers from multiple angles.
Outdoor Flushing: Move to the outside of the chicken house and rinse the outside of the fans from multiple angles as well.
Requirements: Fan louvers should open and close freely, and there should be no feathers or dust adhering to them.
Step 7: Ground, Drainage Ditch, and Screw Ditch Flushing
Ground flushing follows the route of “from front to back, from the middle to both sides,” driving ground debris to the drainage ditches on both sides.
Drainage Ditch Cleaning: First, thoroughly clean the debris from the ditches and bag them, placing them in the designated location on the farm, then rinse the ditches with water. Note: Manure water must not flow onto the main road.
Screw Ditch: The manure discharge screw ditch must be thoroughly rinsed separately to prevent residual manure from fermenting and producing harmful gases.
Water Sweeping: After rinsing, sweep away the water to ensure there is no standing water on the ground; otherwise, it will breed mosquitoes and flies and affect the drying speed.
Step 8: Cleaning the Operating Room
The equipment in the operating room is delicate and should not be directly sprayed with a high-pressure water gun for extended periods. Use a hand-held cloth to wipe the walls, control cabinet surfaces, and tabletops; the floor should be cleaned simply.
Step 9: Cleaning of Waste Channels and Roads in the Production Area
Residual chicken manure on the hardened roads and waste channels in the production area is a mobile carrier of pathogens. Cleaning personnel must thoroughly sweep and high-pressure rinse the area until no visible chicken manure residue is visible on the road surface.
Step 10: Cleaning of the Water Curtain Room
The water curtain paper structure is fragile; direct spraying with a high-pressure water gun is strictly prohibited, as it will damage the paper texture and affect subsequent cooling efficiency. Correct operation: Use a regular water hose with low water pressure to rinse the surface of the water curtain paper, while simultaneously rinsing the walls and floor of the water curtain room.
Step 11: Feed Tower and Foundation Washing
The inner and outer walls of the feed tower must be thoroughly washed, especially the feed inlet and foundation base, to prevent residual feed from attracting rodents and insects.
Step 12: Maintenance of the Chicken House Sealing Plastic Film
The plastic film used for sealing and insulation inside the chicken house must be free of dust, chicken feathers, and chicken droppings. If the film is severely damaged, it is recommended to replace it promptly after washing to ensure the airtightness of the next batch of chicken houses.
Step 13: Wastewater Management
Thirteenth, during the entire washing process, wastewater from the chicken house must not flow out onto the main road. It must be discharged into the sedimentation tank or wastewater treatment system through the on-site wastewater collection network to prevent pollution of the farm environment.
Post-cleaning Inspection and Disinfection Coordination
After rinsing, it is recommended that the farm manager or biosafety supervisor conduct a comprehensive inspection, focusing on:
Whether there are still residues in corners, cage connections, the bottom of feed troughs, and the back of fan blades.
Whether there is still standing water on the ground.
Whether the drainage ditches are clear.
Only after confirming that the cleaning is satisfactory can the next step—drying and disinfection—begin. Remember: Wet disinfection is far less effective than disinfection after drying, and residual moisture will dilute the disinfectant concentration. It is recommended to allow the area to dry for at least 24-48 hours after rinsing before spraying or fumigating disinfection.
Cleanliness and disinfection of poultry farms are not merely formalities to pass inspections, but a real investment that directly impacts production performance. A thorough, standardized, and regulated rinsing process can reduce pathogen load between batches by more than 90%, making it the most economical and effective means of reducing medication costs and improving flock health.