Precautions for Cage Rearing Chicks
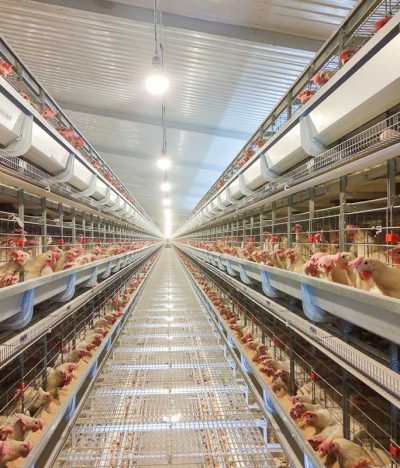
The brooding period is the “foundation” of poultry farming. Cage brooding has become the mainstream choice for large-scale farms due to its advantages such as high space utilization, low risk of disease transmission, and intensive management. However, chicks are fragile and highly sensitive to their environment; even a small mistake can cause mass mortality.
I. Preparations Before Incoming Chicks: Thorough Disinfection and Equipment Inspection
Successful brooding begins before chicks arrive. The more thorough the preparation, the smoother the brooding process.
1. Three-Step Cleaning Method for the Chicken House
Before chicks arrive, the brooding house must undergo a thorough cleaning, rinsing, and disinfection process.
Cleaning: Thoroughly clean feces, dust, and chicken feathers, paying particular attention to areas such as cages, corners, walls, and under heating pipes.
Rinsing: Use a high-pressure water gun to rinse from the roof to the cages and then to the ground, removing 98% of bacteria and viruses.
Disinfection: Performed in three stages. First, spray the cages with an iodine-based disinfectant (2-3 times higher concentration than usual when disinfecting with chickens present); second, scrub the walls and floor up to 1 meter high with a 2%-3% caustic soda solution; third, use a 2:1 ratio of formalin and potassium permanganate for fumigation in a sealed environment for at least 24 hours, with each disinfection at least three days apart.
2. Cage Inspection Must Be Thorough
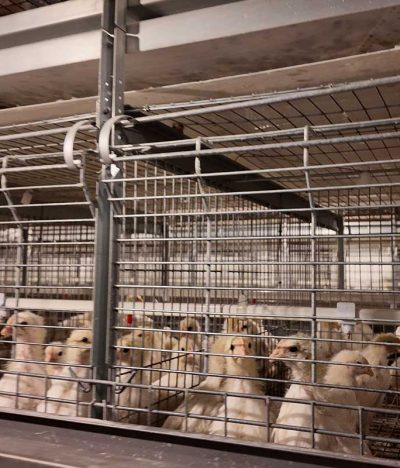
This is a step many farmers easily overlook. Brooding cages suffer some damage after each use. Even brand-new cages can have problems like improperly adjusted baffles or large gaps in the water line, causing chicks to escape or move between cages within 1-2 days of arrival. Before introducing chicks, the cages must be thoroughly inspected to ensure there are no risks of escape, cage mixing, injuries, suffocation, or being trapped. Pay particular attention to the moving parts and adjustment discs of the feed and water holes. Any burrs at the welded joints of the cage wire must be smoothed out; otherwise, the chicks’ skin can be easily scratched, potentially leading to staphylococcal infection.
3. Facility and Material Preparation
2-3 days before introducing chicks, prepare feed, medicine, vaccines, thermometers, water line supplies, etc. Special attention must be paid to water line inspection in cage-rearing: each nipple must have unobstructed water flow. If any nipple is blocked in a cage, all chicks in the cage will face the risk of water shortage.
4. Preheating
Before placing chicks in the coop, it is essential to preheat the coop thoroughly—24 hours in advance in summer, 48 hours in spring and autumn, and 72 hours in winter. On the day of arrival, the coop temperature should be maintained at around 34℃ for 2-3 hours, the cage temperature at 32℃, and the wall temperature above 28℃. Never introduce chicks immediately after lighting a fire; the temperature of the entire coop (including cages, walls, and floor) must be allowed to rise evenly.
II. Temperature and Humidity Control: The First Hurdle to Brooding Success
Chicks’ thermoregulation abilities are not fully developed, making them extremely sensitive to temperature and humidity. This is a core factor determining brooding survival rates.
1. Temperature Management – Observing the Chickens and Adjusting Temperature
The first week is particularly critical. Maintain the temperature in the brooder for 1-day-old chicks above 32℃. From the 4th day onwards, decrease the temperature by 0.5℃ daily, keeping it between 29-31℃ by the end of the first week, and then lowering it to 24-26℃ by the end of the third week.
Whether the temperature is suitable depends primarily on the flock’s behavior; thermometer readings are only for reference:
✅ Suitable Temperature: Chickens are evenly distributed, active, and have a strong appetite.
❌ Low Temperature: Chickens huddle together for warmth, easily catching colds, diarrhea, or even suffocating from being trampled.
❌ High Temperature: Chicks drink more water, have a decreased appetite, and breathe faster; timely cooling and ventilation are necessary.
Special attention should be paid to the latter half of the night, when the natural temperature is lowest and staff are most prone to fatigue. Even a slight drop in temperature at this time can cause chicks to huddle together, leading to serious consequences.
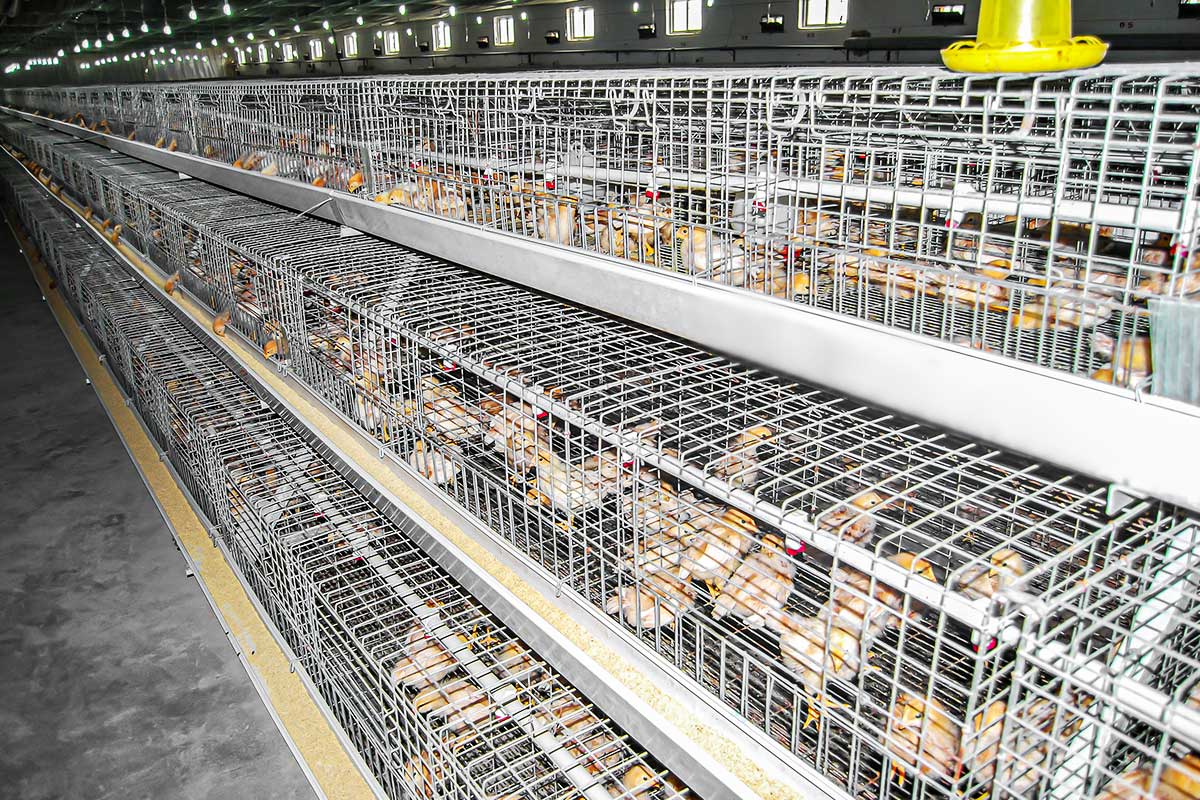
Additionally, due to the higher density of chicks in cages, the reference temperature can be slightly lower than for floor rearing. In multi-layer cage rearing, the upper layers are warmer than the lower layers; newly hatched chicks should be placed in the upper two layers of cages first.
2. Humidity Management – Heavy at the Beginnings and Ends, Stable in the Middle
Humidity requirements differ at different stages of brooding:
Week 1: Relative humidity around 70% is ideal to prevent dehydration.
After 7 days: Maintain at 65%.
After 10 days: Reduce to 50%–60%.
Too low humidity can lead to respiratory diseases, while too high humidity promotes coccidiosis and fungal growth. Humidification can be achieved through misting, ground watering, and delayed manure removal, but ground watering should not result in standing water.
III. Ventilation Management: The Art of Balancing Insulation and Air Exchange
Cage-raised chicks have high density and vigorous metabolism, emitting twice as much carbon dioxide per unit body weight as other livestock, making the air inside the coop extremely polluted. Simply maintaining warmth without ventilation is more dangerous than low temperatures.
For the first 21 days, focus on insulation, using a timed, short-duration ventilation strategy. In the early brooding period, excessive ventilation is unnecessary; focus on periodically replenishing fresh air. The timing of the first ventilation varies by season: in spring and autumn, it generally begins on the third day of age; in winter, it depends on the indoor and outdoor environment; in summer, during the rainy season, if the humidity inside the coop consistently exceeds 75%, ventilation should be timely.
Key points for ventilation operation:
In winter, prioritize horizontal ventilation. During the first week of brooding, the wind speed should be less than 0.5 m/s. Place the external air intake at the top of the coop to allow cold air to mix thoroughly with warm air before entering, reducing cold stress.
In non-hot seasons, before opening windows, raise the coop temperature by 1-2°C to avoid direct cold air blowing on the chicks.
Air quality standards: carbon dioxide ≤1500mg/m³, hydrogen sulfide ≤2mg/m³, ammonia concentration ≤10mg/m³. If a pungent or irritating smell is detected upon entering the chicken house, ventilation should be increased immediately.
IV. Water and Initial Feeding
The first water given to chicks after hatching is more important than their first feed.
1. Water Management
Chicks should be given water immediately after entering the coop. Giving water too early or too late will have adverse effects—chicks that don’t get water on the first day will become weak. Warm water is recommended for the first watering, with 5% glucose and 0.1% vitamin C or electrolyte multivitamins added to promote metabolism and yolk absorption, prevent disease, and improve disease resistance. 12-24 hours after hatching is ideal, and even during long-distance transport, the time should not exceed 36 hours.
The water supply for cage-raised chicks must be checked carefully: Use a flashlight to check each nipple individually to see if water is flowing normally. Water droplets in the water cup indicate the nipple is working properly; a dry cup indicates a blocked nipple. Unlike net-raised or ground-raised chicks, in a cage environment, if one nipple is blocked, all chicks in that cage will have no water to drink. 1. Adjust the waterline height so that the bottom of the water cup is 1-1.5 fingers above the ground, allowing the chicks to drink at a 45-degree angle to the waterline.
2. Initial Feeding Management
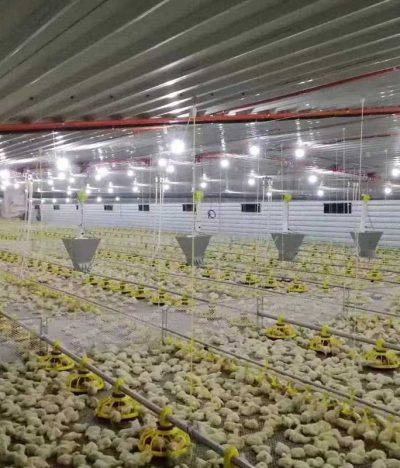
Start feeding the chicks 23 hours after they drink water, adhering to the principle of “water first, then feed.” For the first 3 days, use a “small, frequent feedings” approach, feeding 6-8 times a day (including nighttime). After 4 days, gradually transition to the normal frequency. Feeding should follow the principle of small, frequent, and gradual introduction. A small feed bucket can be used as an initial feeding aid, removing it after about 3 days and transitioning to a feed trough. Alternatively, a feed trough can be used directly, with the initial feed layer slightly thicker to attract the chicks.
The 24-hour satiety rate should reach over 99%, meaning almost all chicks have drunk water and eaten feed. If abnormal feeding is observed, it indicates a potential problem with the waterline or temperature, requiring immediate investigation.
V. Common Misconceptions and Avoidance Guidelines in Cage-Raising Chicks
Misconception 1: Focusing solely on the thermometer, ignoring the chicks’ condition. Thermometer readings are only for reference; the flock’s behavior is the most reliable indicator of whether the temperature and humidity are suitable.
Misconception 2: Neglecting ventilation for the sake of warmth. Especially at night, many farmers close all air vents to save coal, only to find the next day that chicks have died in large numbers due to ammonia poisoning or insufficient oxygen—such lessons are all too common.
Misconception 3: Neglecting management on the first day. Insufficient temperature on the first day causes chicks to be cold, resulting in loss of appetite, water, and activity, directly affecting their 24-hour satiety rate, and consequently their 7-day weight and overall growth performance—management on the first day is crucial for the chicks’ entire lifespan.
Misconception 4: Inadequate water line inspection. A unique risk of cage-raising is that a blocked nipple is equivalent to the entire cage being without water. Each nipple must be checked individually; this cannot be overlooked.
Misconception 5: Neglecting cage maintenance. Problems like splintered cage wires causing injury and chicks escaping through gaps in the baffles may seem minor, but they can lead to significant losses. One case report showed that due to excessively wide spacing between cage wires and burrs on welded joints, chicks began developing skin hemorrhage and necrosis after 3 days of age, with mortality peaking at 11 days.
Cage rearing is a systematic and meticulous management process. From thorough disinfection and cage inspection before chicks arrive, to precise control of temperature, humidity, ventilation, and lighting; from the “water first, feed later” principle to proper grouping density and transition between groups—a small oversight in any step can escalate into a major problem leading to brooding failure.